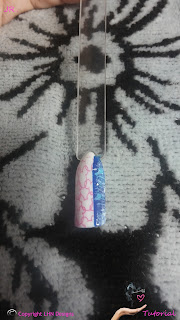
I've been designing nails for 15 years or more. For the last six to eight years I used almost everything you can imagine for nail art but nail polish. This is like going back to basics but having something on my side. Nail Stamping! Almost ready to use designs that demand less working time and you get beautiful and perfect designs each time without the worries of nails not being uniform.
What you will need:
For this tutorial I used Jr.5 stamping plate from My Online Shop
Base Coat
Top Coat (I used Glass Kote- Charlotte)
White ( I used Snow Me White -Sinful Colors)
Blue -Three Shades ( I used Colorina 10,37 and 97)
Pink - This color should be stamping quality( Iused Wet n' Wild Megalast 209C- Candy-licious)
Your favorite stamper and scraper
Fan brush
Detail Brush (20/0)
Porous sponge and tweezers (optional)
Acetone
Metal Studs
A small mirror or color palette
Washi Tape
Step by step
1. Apply base coat
2. Now add a coat of white, it should be a white that covers mostly on one coat, as we will do a few layers more and the final result should not be too thick.
3. Add a layer of top coat. I use Charlotte's Glass Kote (local brand). I really like this top coat because it dries with a glassy finish. It looks a lot like uv gel top coats and the best thing is it evens the polish giving you a perfect surface to stamp on. Plus if you mess up you can carefully remove your stamp with non acetone polish remover, re-stamp and add a top glass kote layer and it wont affect the quality and beauty of your design.
4. Stamping time! with the pink polish I will stamp from Jr.5 stamping plate.
5. Apply top coat and let dry completely. Make sure is completely dry because the success of the next step.
6. With a piece of washi tape cover 3/4 of the nail making sure its perfectly adhered in the nail to avoid polish drips.
7. Apply a coat of the middle tone blue (Colorina 10 Neon Blue) on the unprotected 1/4 of the nail. Remove washi tape before it dries. Let dry completely.
8. Using a fan brush do some dry strokes with light blue horizontally and vertically. Repeat with the darker blue and white, cleaning the brush between colors. Keep doing this until you feel satisfied with the results.
9. This step is optional but it gives the design a realistic jean appearance. With a small piece or a porous sponge, create one or two white spotting areas on the jean design.
10. With the detail brush (20/0) do some random fine lines with light blue to accentuate the denim detail.
11. Apply top coat.
12 Add a vertical line of metal studs before the top coat dries. Let dry completely and add another layer of top coat to secure the studs in place.
As variations you might divide the nail diagonally, you might do a full jean nail or you might just do a white nail with pink stamping as I did on this set. You might paint pockets and everything you feel makes it look denim like. Do random styles on your nails, just be creative and have fun. Let me know if you try this design. Feel free to link your instagram pictures or facebook pictures on the comments below.


No comments:
Post a Comment
Note: Only a member of this blog may post a comment.