Showing posts with label Nail Polish. Show all posts

Friday, April 1, 2016

Born Pretty Haul and service review (exactimes Ebay seller)


Most items on my Born Pretty collection come from this seller. I prefer to buy everything on Ebay because it's a system I can trust. My latest order included a 19 piece set of stamping nail polish, a jumbo stamper, a clear jelly stamper, one BP round stamping plate and a Ya Qin An square stamping plate. With this order I also ordered a BOQIAN detail brush.

I've been ordering from this seller for quite a while now. It is a seller I trust and absolutely recommend. I appreciate when a seller takes the time to answer my questions and tries to ease my worries. Its no secret that born pretty arrives from China, which requires quite a wait. Specially when you live in a US Territory that is not a part of the 48 Continental States, or even not a part of the 50 States. Everything we order here has to go through the East Coast States, Mostly New York, Sometimes the waiting time can get on your nerves. With exactimes my waiting time has been from 10 days to three and a half weeks, no more than that.

With the good timing comes the quality of the products and the communication available with this seller. A seller who is willing to resolve any issues with a client is a seller worth buying from. In this case I received all of my items, sadly one of them was damaged on shipping because it was not well packaged. I sent the seller a picture of the damaged item and asked him to think about options to resolve this issue. I got a fair and kind response, the seller offered a refund or send the item again. I opted to wait for the item to arrive as I needed it and wanted it on my collection. The item was sent to me the next day and it took about three weeks and a half to arrive. I am really thankful for the seller's attention and service. I know I will order again anytime soon and I suggest you do orders with Exactimes-Store-beauty lady_nailart


Monday, February 29, 2016

14 Days of Romance Nails My Designs

I decided to post them all together, so you can see the ones I did in one single post. Later on I'll be posting an individual description on each of them. Sadly by the last days of this challenge I got really sick. And my kids got sick. With one thing after the other I got behind in a lot of things, personal things, family things, school and of course the blog, challenge and social media.

But now I am back on track and I will try to get up to date as soon as possible. I'd like to thank the lady that started this challenge with me but had to finish it without me. Shar, Jen, and Maddie. Thank you girls!

Here are the designs I got to do.


Hearts and Chocolates


Roses


Lace and Bows


Cupid in Red


Friendship Brazalet


Pink Blossoms


Eternal Love


Unconventional Valentine's Color


Passion


Saturday, January 30, 2016

Nail art challenge ~ 14 days of romance


A talented group of ladies and I are hosting a nail art challenge for this upcoming love season. Starting February 1st, we will share our designs and we want you to join us and share your designs with us! You might share your designs through Instagram, You Tube or even Blogger! Tag @shar_nail_art , @maitte_dja, @pueen_queen and @lhn_designs on the captions of your Instagram pics and use #14daysofromancenails when posting your designs, you might also share your video tutorials on You Tube or Instagram. Just share the links with us!

Monday, January 25, 2016

Cherimoya Vernis Clasique as a stamping polish


I posted this design about two weeks ago on my Instagram account. I wanted to achieve a delicate yet casual manicure. One of the reasons I achieved this design was the desperate need to find quality polishes that performed as stamping polishes. After reading horrible articles about indie stamping polishes that went from headaches to nail disease, I was a bit scare on buying or even trying affordable stamping polishes alternatives.


I grabbed my commercial brand polishes and started testing their stamping possibilities. It was no surprise that I got best results with Sinful Colors Snow me white and Black on black. But what about colors?

I grabbed a few colors from different brands and I fell in love with one result! Cherimoya Vernis Clasique was a hit! It stamped beautifully over black and white. I needed to have a design with it!


This is Cherimoya Vernis Color Clasique, Metallic Red, I'd say it will stamp beautifully over any color you'd like to try it. It has a very dense formula and covers in just one coat. It even dries alike most stamping polishes! I recommend this brand for stamping, it works, it has beauniful colors and costs just $1.99 . Get yours and have fun! Just combine it and go on with a great stamping polish option!


And this is how it started! On my next post I will share a diy. I shared a brief one on my IG, but I'll share a more complete one. Sadly I did not take pictures of all of the steps, but I'll try to make it simple even for begginers!

Sunday, January 24, 2016

Romantic in pink manicure


I love pink, but not on my nails! My skin tone looks too pale when I wear light or bright pink shades. So, I decided to share it as a diy instead. 
I started this design to participate in a challenge, but at the end decided not to share it as part of the challenge. It's a romantic design , great for the upcoming season.

What I used:

       1. Bettina Matte for stamping                                                   
       2. Milani Color Statement Hot Pink Rage
       3. Milani Color Statement Doll Face 
       4. OPI Centenial Celebration


        5. Base Coat
        6. Top Coat


        7. Stamper (for the smooshy technique)
        8. Mirror or palette (or even a piece of cling wrap)


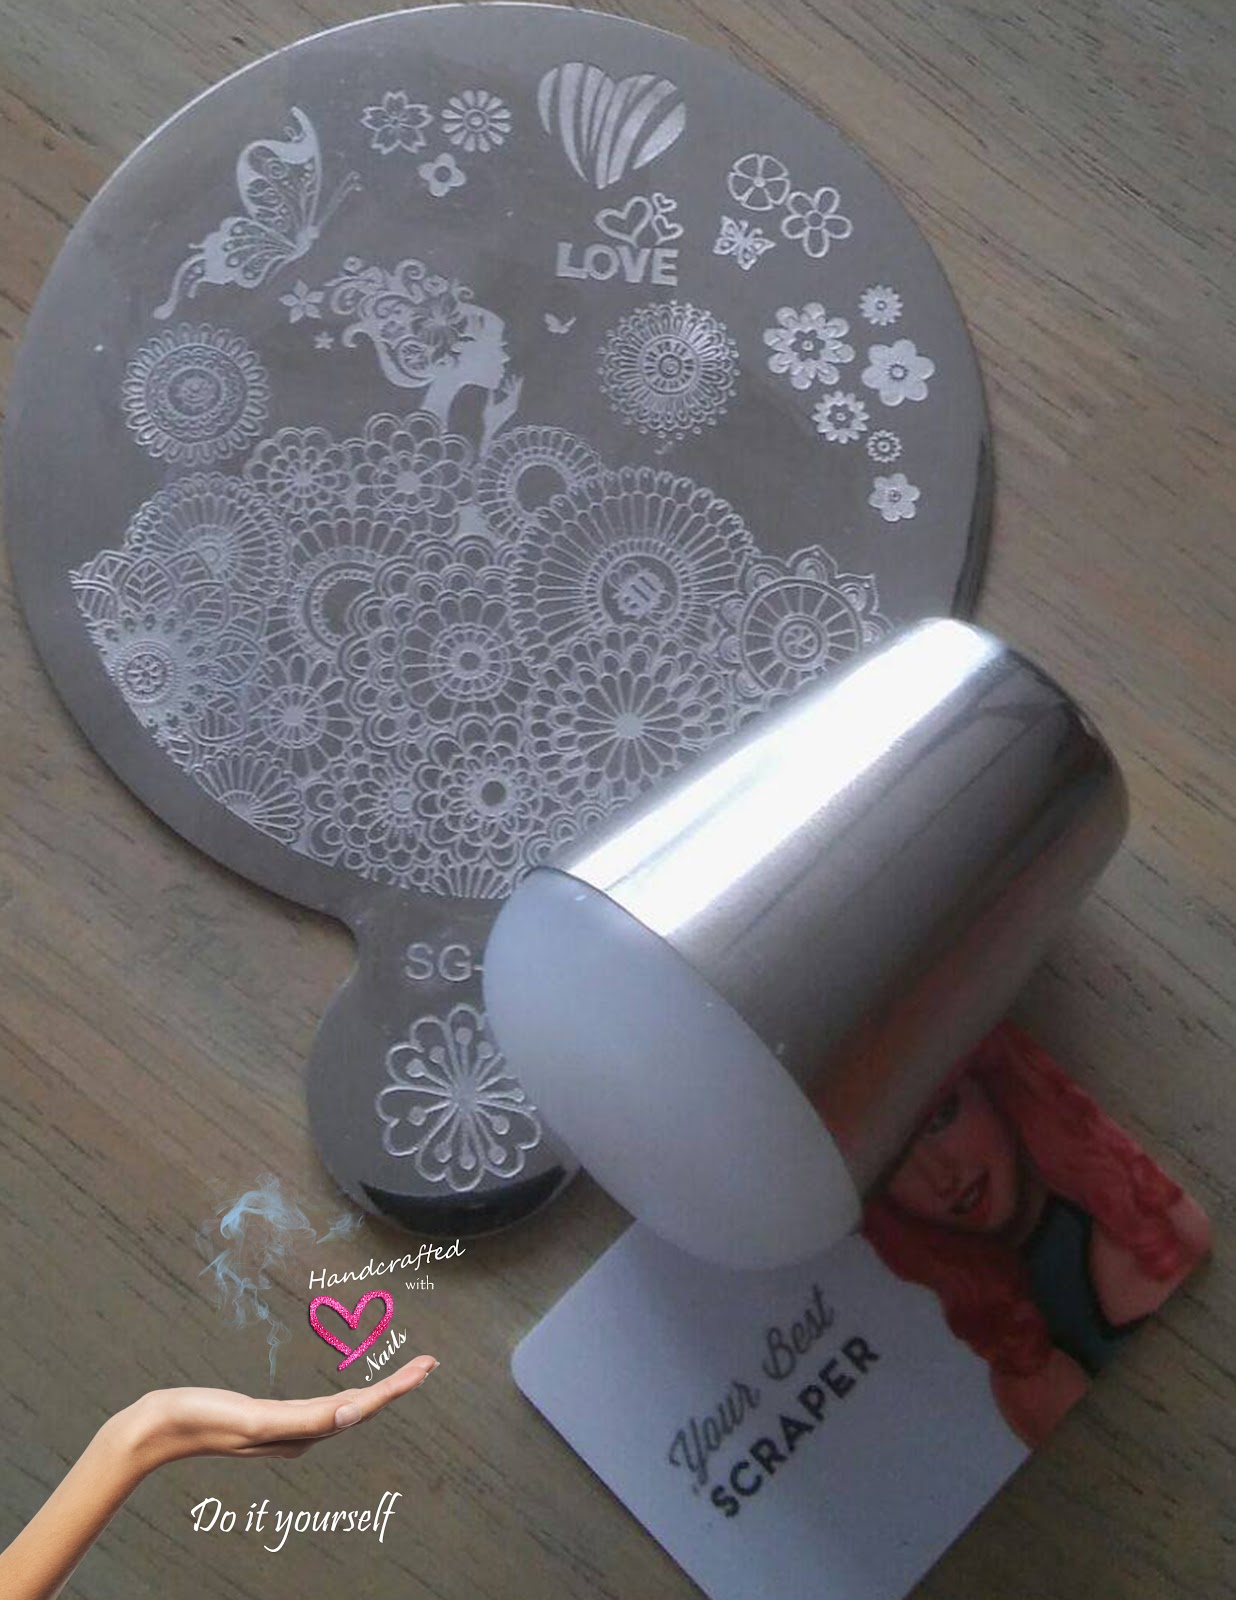
            9. Your favorite flowery stamping plate, I used SG-02
            10. Marshmallow squishy stamper and a scraper

For this manicure I used the smooshy technique. This easy and fun manicure takes only a few minutes no matter your skill level. In fact, I am sharing my learning process with you today! I've heard from some youtubers that there is no right or wrong way of doing the smooshy technique. Don't be afraid to experiment with it, just go with the flow and enjoy the process! 
Some people do this technique with a piece or cling paper or the back or a stamping plate. But I am an organization freak and I feel more comfortable using a mirror. It's less messy and its easier to clean. Having said that let's start with this fun process.


First I applied base coat to my nails, to avoid staining. I prepared my fingers applying liquid latex to protect  from polishes while doing the smoochy technique. Then poured a drop of each color on the mirror. I made a swirl with the colors using the smaller head of my stamper. Next I started applying the colors with the stamper filling in spaces and trying to achieve a marble pattern. When the smoochy nails were completely dry I applied the top coat to even the nail surface so I could stamp on it.


After the top coat dried I removed the liquid latex and reapplied liquid latex to my fingers again to protect from stamping residues. Using Plate SG-02 which I bought from an Ebay seller (if you'd like the info let me know ina comment below).  I wanted a rustic look, not the perfect crisp white stamping, so I decided to use Bettina Matte, it stamps but not as crisp and white as a stamping polish would do. I made sure I let the stamping dry enough time so it wouldn't smear as I applied the top coat. Hope you give it a try and remember to visit the blog regularly for fun diy's and good information and freebies. 


Monday, January 18, 2016

The Printable Mat

We all love to have a template to practice our nail art. Since the beginning of nail art there has been templates ( "practice sheets") available for us to paint or draw on. even to improve acrylic application speed there are practice sheets available.
Most companies are making a variety of stamping mats for us to practice and test colors. Even to do our decals on making our hobby even easier and pleasant. But not everyone has access to online ordering,or even worst, some countries make your orders online a nightmare. In the best case scenario you'll have to waste a whole day and pay additional fees in order to have access to your products.
My daughter and I took the time to develop this for you! "The Printable Mat"is the result of team work and a lot of working time  . Now you won't need any sophisticated graphics software or online programs to print your very own stamping mat. Just download it, print it and use it in the most convenient way for you!


Test colors, try color combinations, make your own decals. Test stamping polishes in black or white! "The Printable Mat" provides you spaces for all your stamping needs. 


"The Printable Mat" is free. Just read Terms and Conditions!

Terms and conditions
1. Must be a Follower of all my social media.
     a. Join this blog. Hand Crafted With Love Nails (Join This Site)
     b. Follow @lhn_designs on Instagram (Badge Button on sidebar)
     c. Subscribe to Handcrafted With Love on You Tube ( Make sure we can see your subscription, if         they're private wecan not see)
     d. Follow @Licy76 on twitter (Link Button  on sidebar)
     e. Follow Handcrafted with love on Google+ (Badge on sidebar)
Note: If you are on a cellular or tablet you need to access the link to the full website on the bottom of the blog to be able to view the buttons.
Then send message via contact form with your username on each social media (this to verify you are a follower) and an email to sent you the mat's pdf
2. "The Printable Mat" is for personal non-commercial use only , any unauthorized commercial or online use of the mat violates our intellectual property and copyrights. We will proceed with legal processing.
3. Do not alter or edit "The Printable Mat" or any of its drawings, logos and/or copyright typing.
4. "The Printable Mat" is not transferable, it's solely for your personal use, no group printing! If you'd like to share our mat with a friend ,you should share a link to its original post. (this post).
5. Accept the terms and conditions in a comment below this post.
6. Do not unsubscribe or unfollow after you receive your printable mat, it's not honest and you might loose the chance to download more printable goodies from our blog and the giveaways!

Instructions of use

1. Print "The Printable Mat" on a letter size paper or card (8.5 in x 11 in). Use landscape orientation.
2. You might place on or under one of the following
    a. Sheet protector
    b. A plain silicone baking mat
    c. A clear flexible chopping board
3. You might also laminate it.
4. Enjoy your alternative stamping mat and start creating!


Monday, January 11, 2016

Polish Storage and Organization tips

When we let ourselves get  into the calling power of beautiful nail polishes we end up creating a much bigger situation. Storage! Not only our nail polishes become one of our most important treasures, but these tiny, colorful, beautiful bottles are very fragile too.
How painful and stressful it is when one of our polishes gets lost, or worst! BROKEN! We need to assign a specific clean, fresh and secure area for our polishes. here are some tips that helped me protect my babies!


This is my organization plan. It has worked for me (and my girls!).
1. Store them in a dark organizing tower or drawers away from windows and exterior walls. This will protect your nail polishes from direct sunlight,dust and temperature. Your polishes will last longer.
2. Separate your nail polishes by brand. That'll help you identify which polishes you have from each brand. Keeping them together will help you with space since every bottle has the same shape.
3. Keep track of the colors you already have. You don't want to duplicate colors in your collection. Most of us want our collection to grow but duplicating takes more space and you'll have less colors.You can do this with several app's or just make a list.
4. Clean your organizing area and your polishes regularly. Having a dusty polish bottle might lead to product contamination with dust particles.
5. Get rid of empty bottles ASAP. You'll need that space for future polishes. If its a color you like it a lot just write down the name and get a new one.

A growing nail polish collection

I have to admit I am a compulsive shopper (specially when there is a good sale, or beautiful colors, or a well reviewed brand, or I am sad, or bored, or curious...I think you get to the point). I stopped using and buying nail polish since the invention of colored acrylics polimer and the art of encapsulating glitters and everything you could think about on nails. Then 3D designs were the coolest thing in the nail world. So I used to go for long nails with lots of 3D designs, and crystals. Yes! I have lots and lots of colored acrylics, crystals, studs, flowers... you name it. Its not that difficult to get nail art when you have ebay and swaps on your side. Then something got my attention...GELS! Gel Polishes! Brushes! Yeah I got a lot of those too, even one stroke gels and 3D gels. My living room was overloaded with nail art supplies, just to do my own nails. I had to do something about that so I made my best to stop bringing new stuff to my house. I organized everything in carts and cases into my closet, and suddenly my living room was free!

I minimized everything nail related,from nail length to working area.I tried to use the less products I could, trying not to make a mess. Then something happened! I discovered nail stamping ! I did have 3 round stamping plates but never learned how to use them. And in order to stamp I needed nail polish and that is how it started.


How and when did I go from 20's nail polishes to 265??? I received some from friends and family but  it's still a huge collection that needs storage space. I could divide them by colors, by brand or shape and I will still have a lot of each.


Having a selection of nail polishes makes your work easier in many ways. But  it's a huge space and organizing problem. The worst part is that once you start your collection you'll want more...and more...and more! And even more!!!

Saturday, September 5, 2015

My Online Shop Stamping Plate JR. 5 Swatch and Review


This is the first review for my Messy Mansion and My Online Shop Hauls. This time I'll be reviewing Jr. Plate 5 and Messy Mansion Double Stamper Deluxe.

I have to say I absolutely love the stamper. I had to prime it though but after I did it picked up just fine. For this review I used only the white stamper head. 
Overall plate Jr.5 is a great add to any collection. Most of the designs have a crisp perfect transfer. I used Sinful Colors Black on Black nail polish for this review. 


I also have to say that the thinner detailed designs were kind of hard to fully pick up , I did have success after trying several times but it was a bit frustrating. Still I love this stamping plate. My advise for the thinner detailed designs, scrape only once and work it out fast.


And the final outcome (On Paper)


This is a really nice stamping plate. I worked some beautiful designs with it. I will share a tutorial soon on this blog. Stay tunned!


Thursday, July 23, 2015

Pop-arazzi haul color swatch and review


Results after applying two coats (three on Shell Me More and Teeny Yellow Bikini)

I am a very demanding person when it comes to top coats. Because of that I am almost married to UV and LED top coats for nail art. But as you know UV and LED top coats are only wearable over acrylics, gels and gel polishes (one type for each). These top coats can't be worn over a regular polish mani, sadly, it will start to chip the very first day. That is the reason I stopped working with nail polishes. But if I absolutely had to work with polishes because a client absolutely wanted it (sorry for the word duplicity), there is only one top coat I trust. And that is Charlotte's Glass Kote (a local brand). I love this one because as the name implies it dries as a liquid glass layer. It is really shiny and protects the nail polish from chipping for longer time than regular top coats. It looks exactly as a UV or LED cured top coat.

Having said that, I'll start my review with the top coat for this brand , Clearly Thinking. This top coat has its tricks. The first time I used it it apparently had an attitude. It did spread even, but tended to shrink and ended up creating some roughness over the nail polish. I have to make clear that I applied it over another's brand white polish swatch I had already dry. I could think one of too things as the white polish was completely dry and even, either the two brands did not make good chemistry, or the temperature that day affected the drying process of the top coat.
 The second time I tried it I applied it over the pop-arazzi first swatches I made and it dried just fine. Again it was a different day.
Today I tried it in the morning for a third time, and I applied it to a naked artificial nail. It dried beautifully . It applied evenly and dried with a beautiful shine. It's the first top coat I like besides Glass Kote (but not more) I think I have to put it to the test for durability and chipping. And as advice, do not use too much of it. Just a regular, perfect application.

Color results after applying one coat


Shell Me More, OMG! this color is responsible for the existence of this haul. the color haunted me. Its like a minty green, but not that green, a little bit more on the baby blue side, itis so sweet. But.... the formula is too thin, I had to apply three coats to make it opaque, so I recommend using a white base. Either way it is a lovely color.
Teeny Yellow Bikini, as most yellows the formula is really thin, almost sheer. I couldn't get an even color with just one coat. When I applied the second coat it started to look even but still a little too sheer for being a creme polish. It was on the third coat that color started to pop, but a bit uneven. It needs a white base coat for sure. Beautiful color though!
Lime-ousine Ride, this is one of the most beautiful greens I've seen at drug stores. It reminds me of ONS colored acrylics I used to sculpt leaves, even Organic Nails has a color like that which I also love. This is a lime-grassy light green. It's a creme polish, but its formula is a bit thin. Despite this it was possible to get it opaque in two coats.
Don't Need No Romeo, this is a strong color. Its like a hunter green, and a really dark one, i couldn't difference it from the black until I did swatch it . It has a light formula but I was able to get it completely opaque in two coats.
Curfew, this is a black polish. It covered pretty much in one coat,. I was able to get it completely opaque in two coats.
Break His Heart, the hue on this color got me, it's kind of a type of  burgundy  but more on the purple side, it is a really deep shade with almost a blackish shade. It has a really good creme formula, but still I needed two coats to make it opaque and take it similar to the bottle tone.
Carmella Latte, reminds me of toasted caramelized nuts. This color has its own personality. I have to say its one of my favorites on this haul. It's great formula covered almost in one coat. I decided to add another coat just to intensify the color but in my opinion is a nail polish that can be worn in just one coat. 
Mango Colada, although this is a nice colors it's not one of my favorites from this haul. It reminds me of a papaya "champola" which is a local milkshake made out of milk and papaya (obviously). The thing is I hate "champola", and that is why I don't like the color that much. But as I said it sure is a nice color and should be great on anyone else's nails. It has a thin formula, so two coats were needed to make it completely and evenly opaque.
Tropical Tango, it's a hit! This one is an intense orange color and has a great formula. It covered evenly and got opaque on one coat. Even the intensity of the color was perfect in one coat. I just love this nail polish.
Reddy, Set, Action!, this is a bright red. It's formula is great. It covers pretty much in one coat, almost got opaque in one. I added a second coat just to intensify the color because it was pretty opaque already with one.
Mind Your Manners, beautiful deep magenta. It has a thin formula. Although its a bit sheer, I was able to get it completely opaque in two coats.
Razz Baby, this one is another shade of magenta, this lovely color has a great formula, another one  of my favorites on this haul (I think I could make a top five out of these). It got opaque in one coat, you might add another coat just to intensify the color but it can be worn in one coat.
Flamingo-go, this is a bright magenta. It covered pretty much in one coat, just added another coat to even and intensify the color.
Call Me a Cab, great formula for a neon. I was able to get it opaque in just two coats.
Blushing Beauty, it has iridescent and pink micro glitters in a pink jelly base. It covered pretty much everything in just one coat with an even glitter coverage. I decided to add a second coat to intensify the color. I recommend using a good quality top coat as it has some texture.

Color results after two coats

Last but not least, Cute-icle cuticle oil. I loved this cuticle oil, besides its cute packaging it has a nice fruity scent and its absobed smoothly.
Overall I can say this is a good brand to buy on a budget.


 My Top 5 from this haul

5. Teeny Yellow Bikini
4. Lime-ousine Ride
3. Shell Me More
2. Tropical Tango
1. Carmella Latte


Pop-arazzi Haul


Funny being a qualified nail tech for quite long time now I decide to share a drug store nail polish brand haul. Well after buying really expensive acrylics, UV and LED gels and a few brands of gel polishes I went back to basics. I feel almost like a newbie and I am walking my first baby steps back into nail polish and traditional nail art. In the last two weeks I fell in love with a brand I discovered in CVS while I was looking for polishes I could use for nail stamping.
Honestly it was the packaging what got my attention. Those cute polka dots drove me crazy. Then I discovered a few good colors I decided to try. They were on sale and I had some CVS extra bucks so I ended up spending $6.00 for my first purchase and a little bit more for the second one.


From the center up and going clockwise:

1. Cuticle Oil- Too Cute-icle
2. Top Coat- Clearly Thinking
3. Shell Me More
4.Teeny Yellow Bikini
5.Lime-ousine Ride
6. Don't Need No Romeo
7.Curfew
8. Break His Heart
9. Carmella Latte
10. Mango Colada
11. Tropic Tango
12. Reddy, Set, Action!
13.Mind Your Manners
14. Razzy Baby
15. Flamingo-go
16. Call Me a Cab
17. Blushing Beauty

Once I tried the first polishes I brought home, I loved the colors, the formula and some of them got opaque in only one coat, so I decided I had to get more. These colors are the ones I could find on the nearby CVS. I am still looking for more colors because I absolutely loved them. I am working on the review so....stay tuned!!!